
How to seal leather with the best leather resist, liquid frisket.

How to seal your leather with liquid frisket for 100% resist.
Resisting with frisket is a great way to get an absolute 100% resist. It completely covers the leather then peals away when you’re done. This is one of the rare cases where you’re going to want to really put something on thick. If you go too thin it will dry quickly and stick to the brush and be difficult to remove later. I also suggest doing two thick coats. It will make it far easier to get it all off later. If you're in a rush, doing the second coat only in the deep groves and cut lines may be enough. Just make sure to really cake it on.

First, pour some frisket into a separate container. It dries fast and can get stringy if you leave it open.
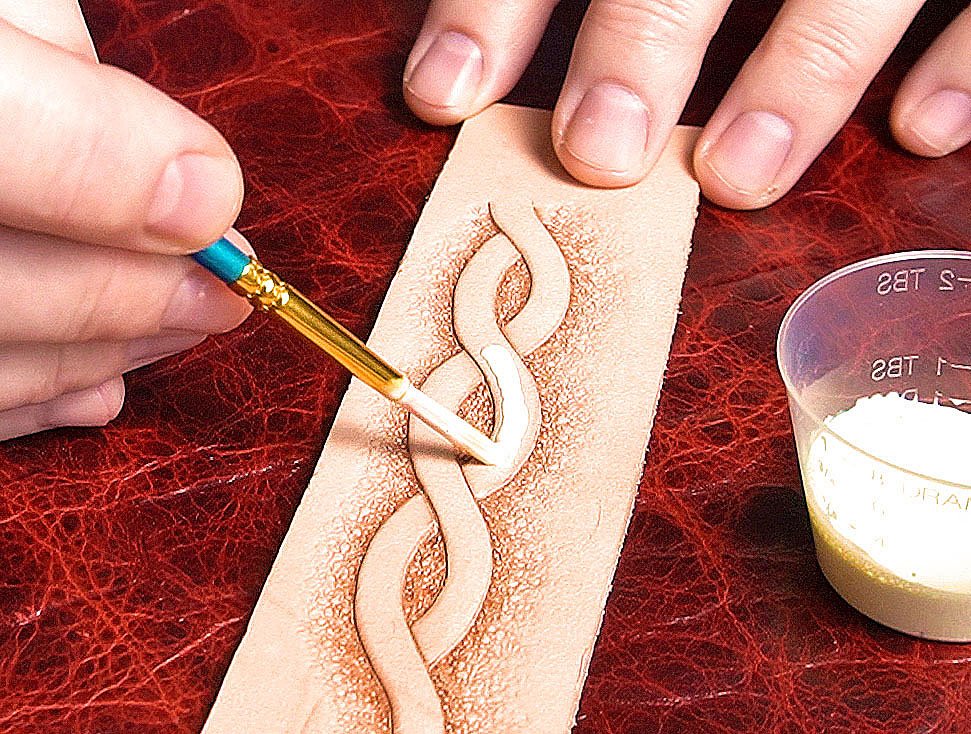
Use a brush you don't mind ruining and load it with a significant amount of frisket. I prefer using the tinted version. It helps me
see where I've applied it. Begin laying a thick layer onto your piece away from the edges.

I found that placing the drop from your brush toward
the middle and working it around quickly to disperse it a bit first, then bringing the frisket up to the edges works better.
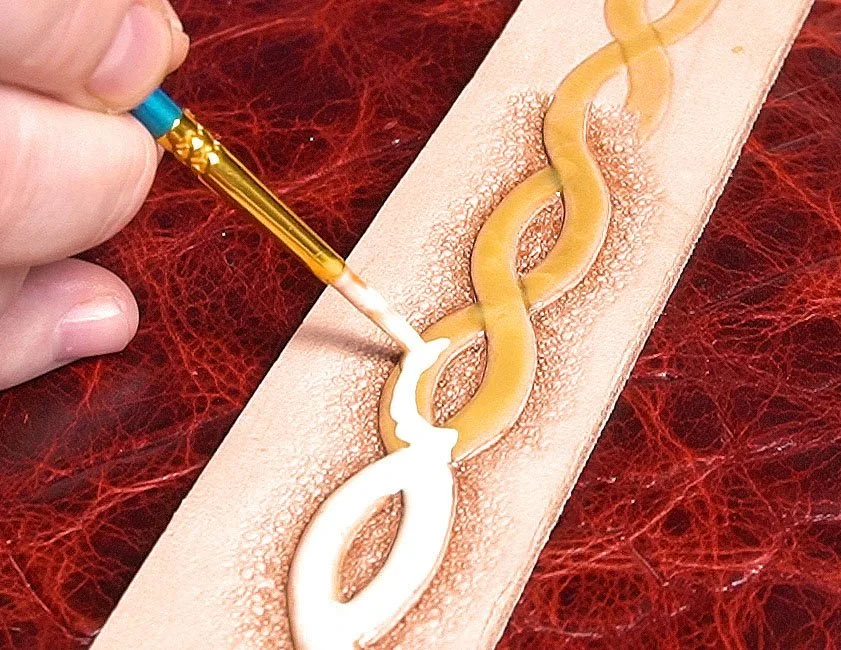
Basically what you want to do is form a shallow puddle then move it around across the section you’re working while simultaneously loading your brush with more frisket as you go. Make sure to keep an ample supply flowing in order to avoid it drying too quickly. It will also make it easier to get off later.

I’ll sometimes tip the piece to help the pool move in the direction I want. Going extra thick on all the grooves and cut lines will really help when it's time to peal it off.
If you're antiquing the piece afterwards you won't need to be as diligent when working the edges. Some of that will be covered up. If you're not going to antique it, be careful not to let the frisket work down into the cut too much. You'll still want to get the sides of the tooling, just be careful not to hit the leather on the opposite side of the cut. Right after you finish the first coat it can be helpful to add an extra drop to the cut lines and deep impressions.
Apply the second coat after the first has dried. It will go on a bit smoother this time since the leather won't be pulling moisture from the frisket.
When you place your loaded brush onto the leather it can be helpful to keep it down in the pool of frisket. This will give you more control over the flow. If you lift your brush the drop my go where you don’t want it to.

You'll notice frisket will start to thicken and build up about halfway up the brush and just on the very tip. It won't happen as much on smaller
pieces, but if you're working a large piece this is something you'll have to deal with. Here's a picture of a brush after working with it for
a while. If you go to wipe the entire brush off it will pull down the big glob (A) and smash it into the bristles rendering your
brush much harder to use. If you leave it completely alone the little glob on the end (B) will start to build up too much, get stringy, and pull
across your piece potentially smearing the frisket where you don't want it.

I found the best way to keep using the same brush for as long as possible is to grab the little glob just on the very tip by pinching it with my fingernails. That way you stop it from forming strings and keep the bristles from getting all mashed together with thickened frisket. You can see here even though it wasn’t built up much when I pinched the frisket off the tip it was already starting to get stringy. Save the brush when you’re done and let it dry. It works great for pulling bits out of the deep cuts.

Keep in mind when you’re coloring the piece that most dye will soak in to some degree. To stop any color from seeping up underneath I use
an air brush. Work the color up in layers making sure not to saturate the leather too much.

Blot the droplets off the frisket
with a paper tower after each coat. This will ensure no drips accidentally fall down into the cracks. It will also help keep any extra dye from
transferring to the clean leather underneath when you peel off the frisket.

If you use a paintbrush to apply your dye
chances are it's going to pool up in the depressions.

When that happens it's going to work its way in, potentially ruining your
piece .

After it dries you can either peal it off, or rub it off with your fingers. But be careful, if there's any dye on the frisket you could
pull it up and rub it into the clean leather underneath.

That's all there is to it, if everything was done correctly you should have a nice sharp dye line
with no color where you didn't want it.
There’s also a video version of this article here, or go to my Video page. For Leather Working Supplies, Tools, Patterns, Instructional sets, and Custom Art check out my Shop.
Thanks for reading.
Tony Allen Bernier